Start by clicking on the Collect Insights button on the top right corner

3 ways you can start your survey
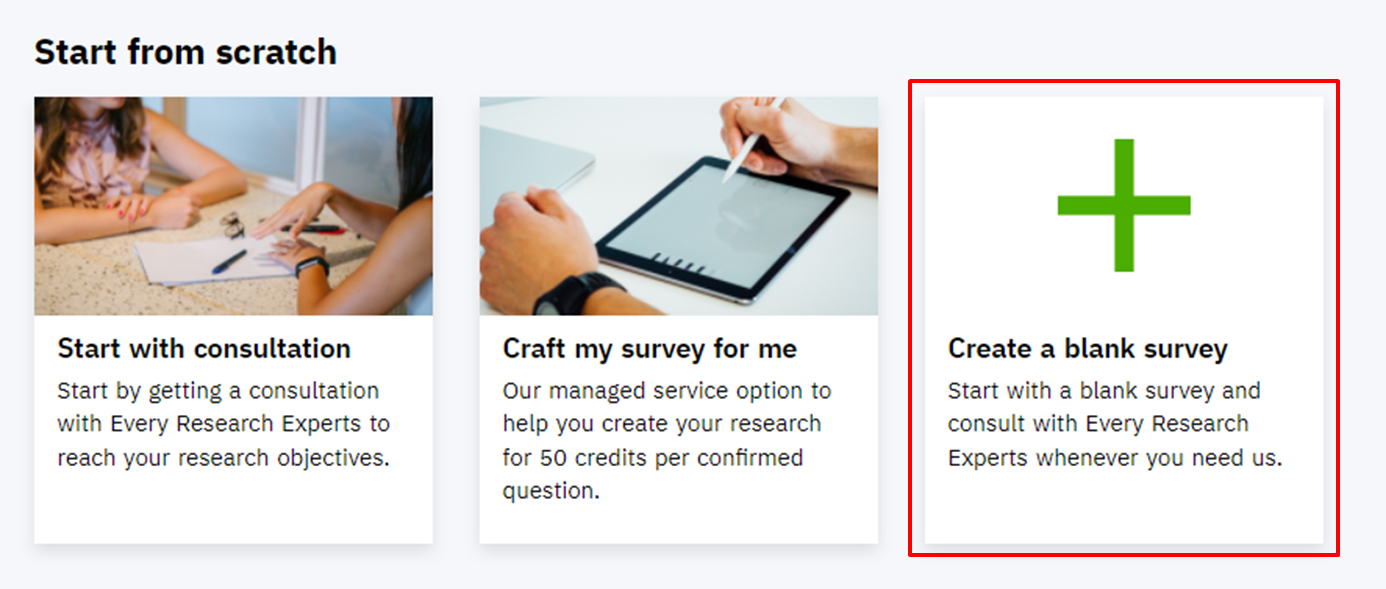
- If you already have your questionnaire ready, select Create a blank survey.
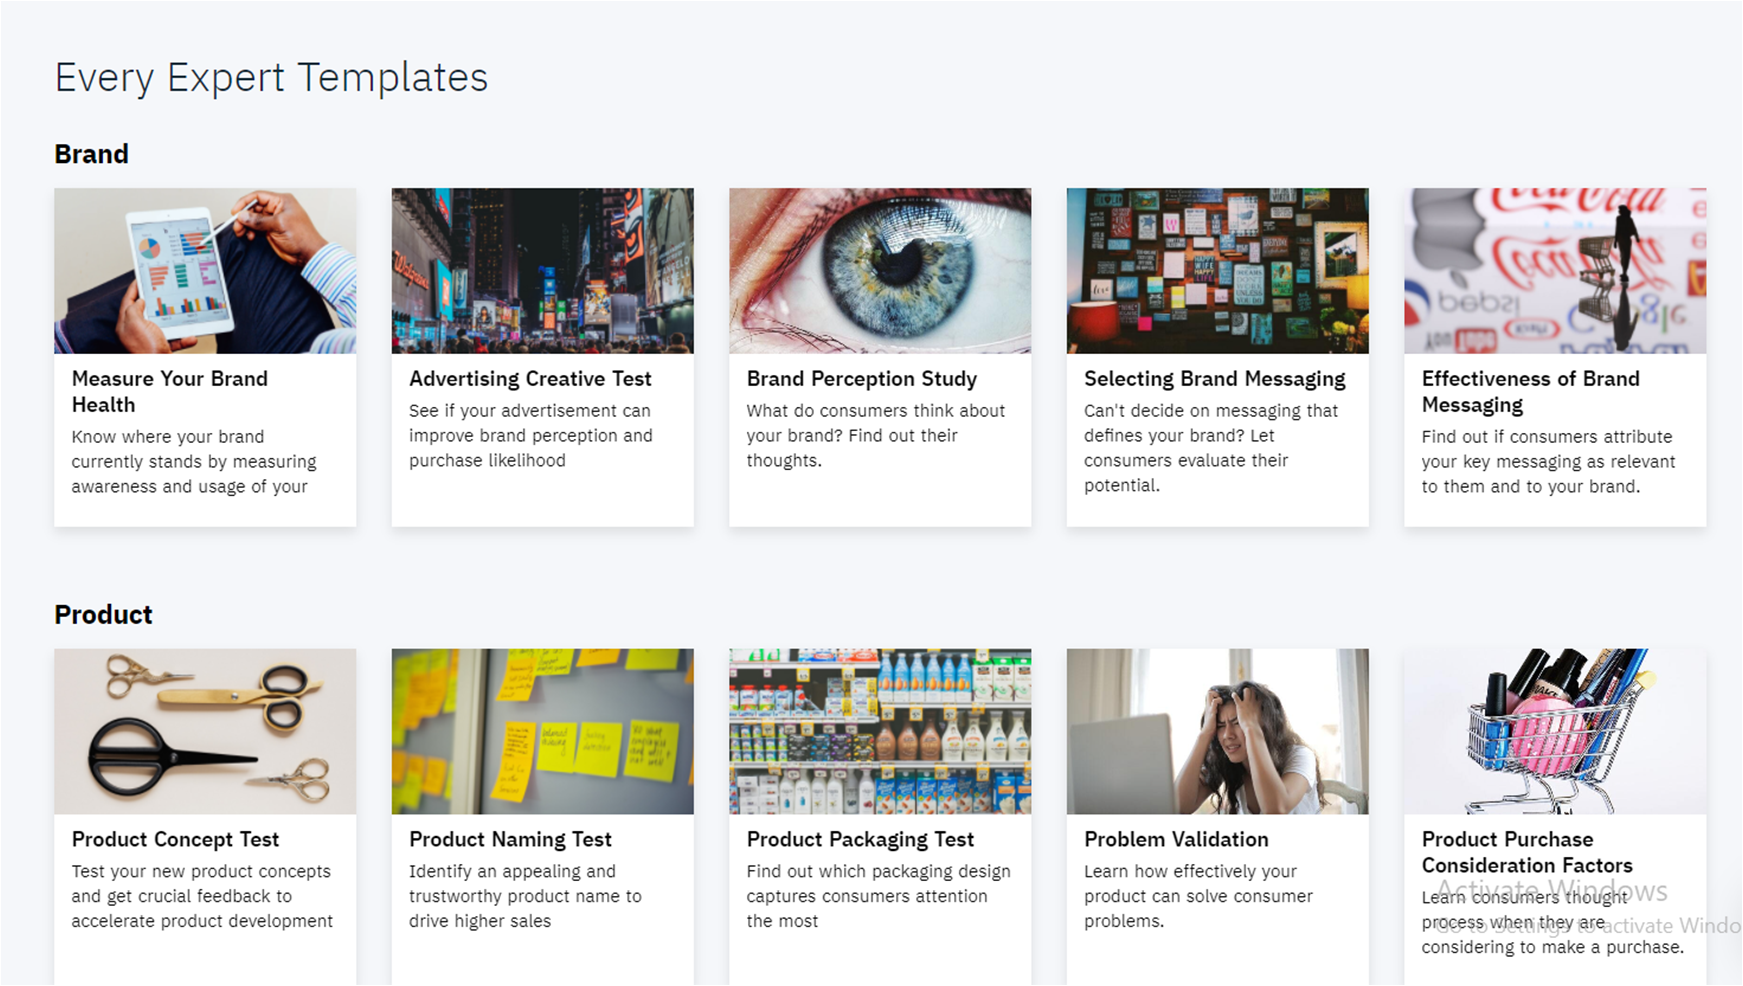
- If you already know what you want to research but are unsure about how to ask your questions, browse through our pre-existing templates and choose one that's relevant to you!
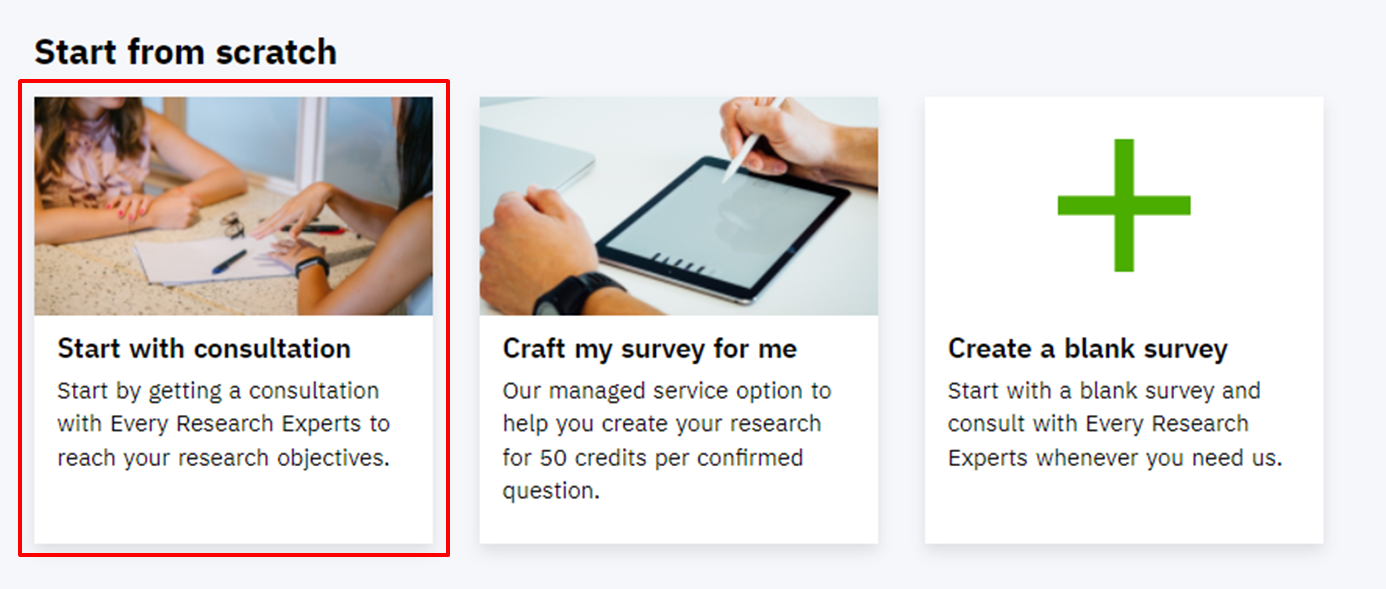
- If you have some questions ready but don't know how to continue or are unsure if the survey covers your research objectives thoroughly, select Start with consultation
Regardless our Vase Expert will be there to assist you with your survey if you have any queries and review your survey after you've submitted it.
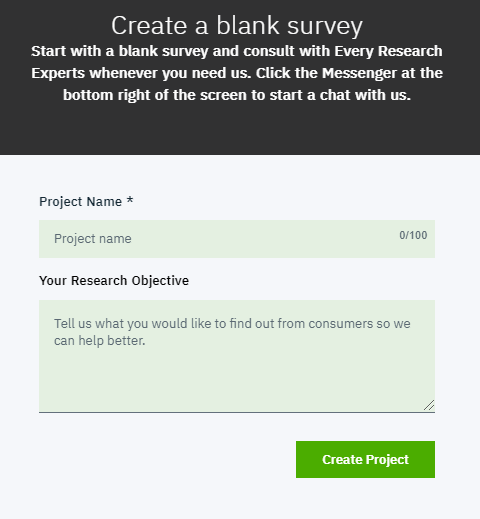
After selecting the option that's relevant to you, you may fill in your project name and your research objective.
* Do fill up the research objective as thoroughly as possible so that our Vase Experts could best help you after understanding your needs.
A good research objective would include:
-
What the data is going to be used for or what decision will need to be made based on the results
-
If the research requires further checking in the future (e.g. will the survey be run again, will you be creating a new survey based on the results of the first one, etc.)
-
If there is a hypothesis to prove/disprove (and what the hypothesis is based on, if relevant)
e.g: We think that people dislike the current packaging, hence the sales are declining. We would like to check if our new package design will be better than our old package design. We will use the results to convince the management team that we need to change our product packaging.
Choose your audience
By default, Every will send out surveys to a sample of people that represents the age, gender, racial and regional split of the Malaysian population.
 If your survey needs to exclude certain demographics (e.g.: excluding Male respondents in a survey for women's products, excluding those Under 21 years old in a survey regarding credit card applications), uncheck those boxes before proceeding.
The same applies to targeting consumers outside Malaysia.
Creating your survey
Click on Add new question to start with your first question. Add a question text by clicking on Type question here then move on to adding choices in Type choice here.
Use the Tab and Enter key to help you with navigating the creation of the survey.
Question Types
-
Screener:
Use this to reject participants based on their answers. Particularly useful if you're afraid that a respondent that answers a particular answer does not fit the target audience of the study.
-
Single / Multiple Answer:
Use this to force a respondent to answer based on a limited number of choices. Toggle Multiple Answer via the Settings button.
If you would like to include an answer option for "Others, please specify", you no longer need to manually create follow-up Text Entry questions and set up complex display logic for respondents to specify an alternative answer.
With our new features, you can effortlessly include these choices using dedicated toggles directly within your Single or Multiple Answer questions:
-
Automated: Others: Simply flip this toggle to instantly add an "Others, please specify" option. It automatically handles the text entry field for you.
-
Automated: None: Flip this toggle to quickly add a mutually exclusive "None of the above" option to your list of choices.
-
Dropdown:
Use this if you want respondents to freely type out their responses but would like to guide them via auto-complete to avoid typological errors. This would be helpful when the answer options are names or brands.
-
Text Entry:
Use this if you want respondents to freely express their answers.
-
Ranking:
Use this if you want respondents to determine which item is more important than others.
-
Rating Scale:
Use this if you want to find out the intensity to which a respondent would subscribe to an answer (i.e. a respondent answering 1 on an answer < respondent answering 10 on an answer)
-
Grid:
Use this if you want respondents to answer a series of same questions in which the topic changes slightly.
Survey features
Use this feature if you want to control the number of respondents choosing a particular answer option. E.g. to have at least 50% of respondents who like cakes.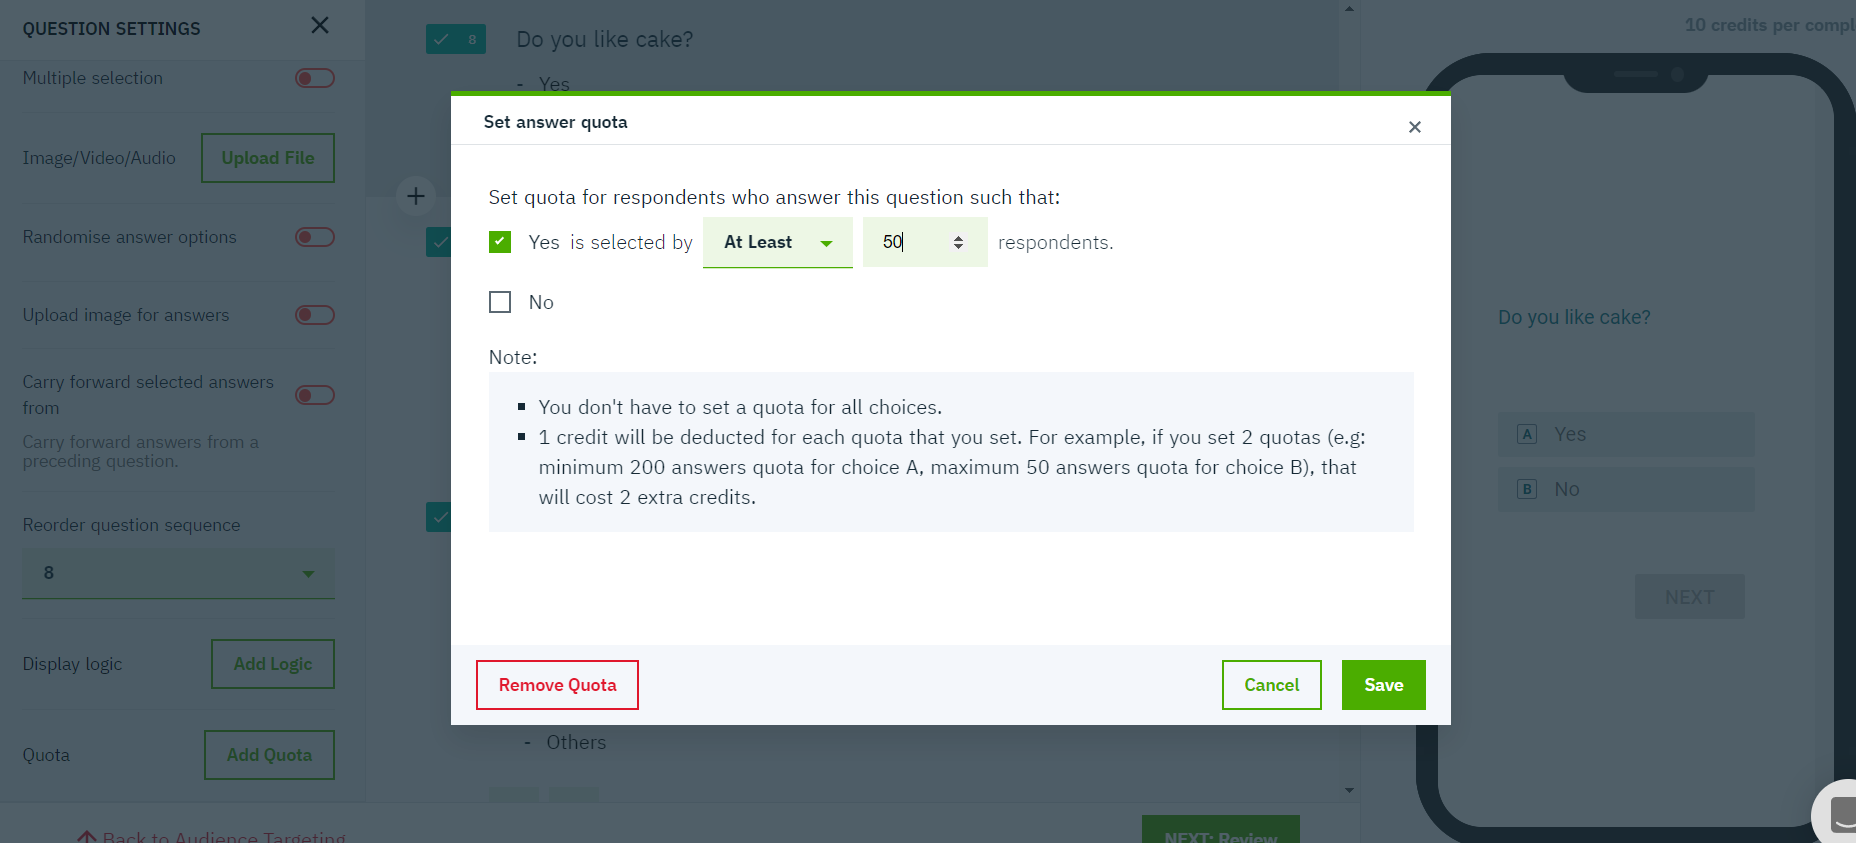
-
Display logic
Use this feature if you want the question to only be answered by respondents who chose a particular question i.e. only asking what kind of cake is liked by those who like cakes.

-
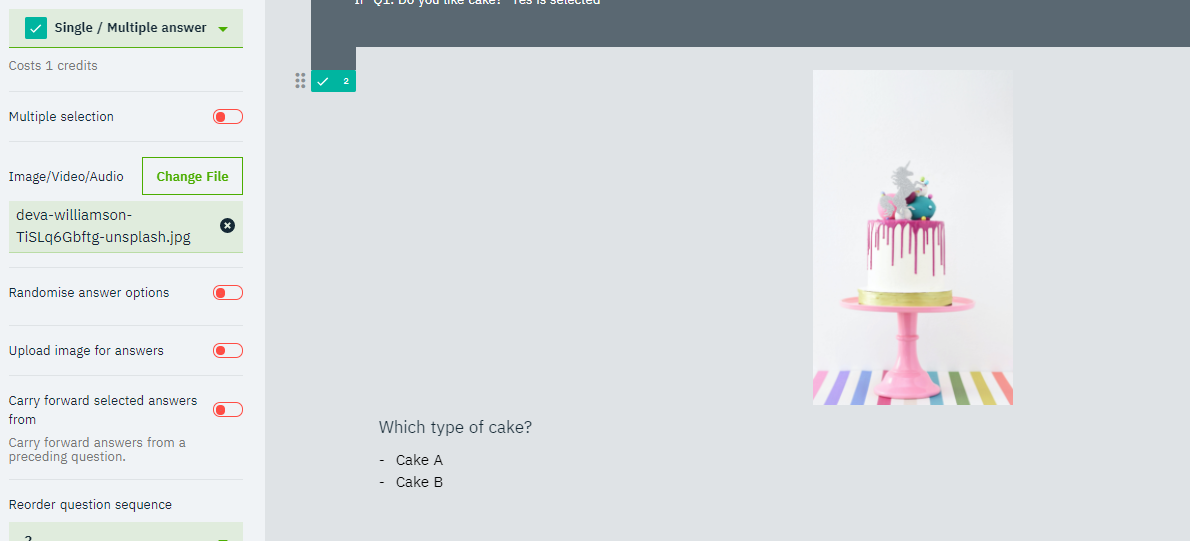
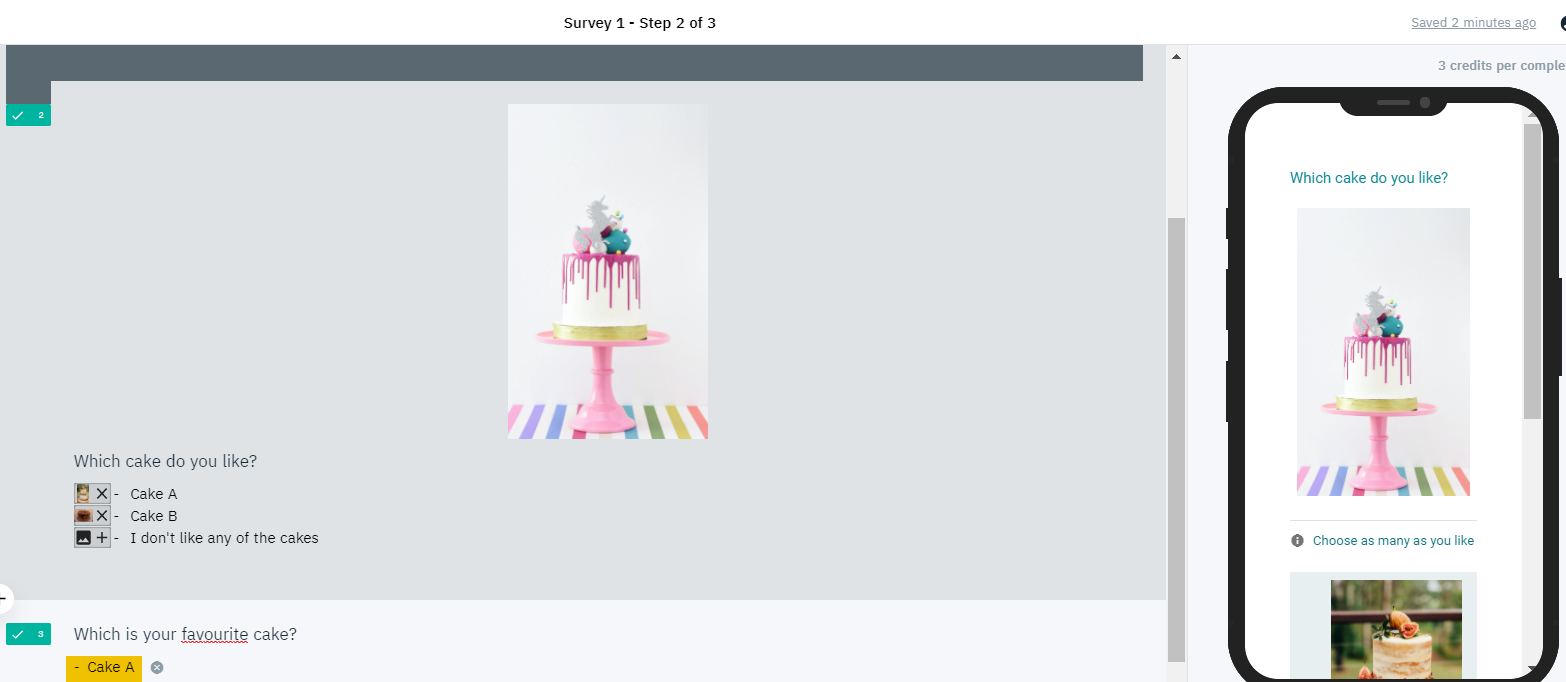
Upload Images in Question
Go to the Settings of the Question and click on Upload File under Image/Video/Audio. Insert a jpg or png file and it will be inserted into the Question Text.
-
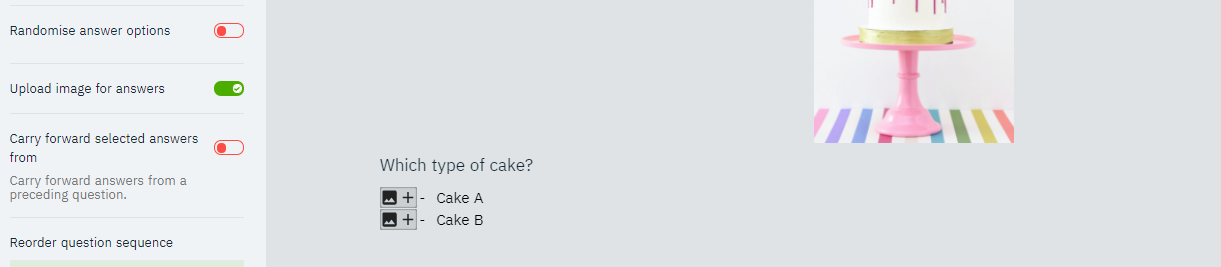
Upload Images in Answers
If you want to insert images to the Answer options, toggle it under Upload image for answers and click on the + sign on the left of the answer options.
-
Exclusive Option
If you want an answer in a Multiple Answer question to not allow any other answer options to be selected with it, toggle the Make selection exclusive option and select the answer to be made exclusive.

-
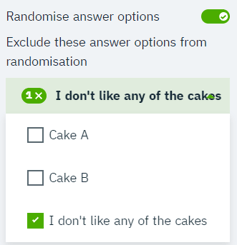
Randomize
Toggle Randomise answer options to display answer options in a random order to respondents. This is needed for questions with a lot of answers to reduce respondent bias in selecting the top most or bottom most answer.
In the event that there is an exclusive answer option that doesn't warrant randomising, check that answer option so that it stays in place while the other answer options are randomised.
-
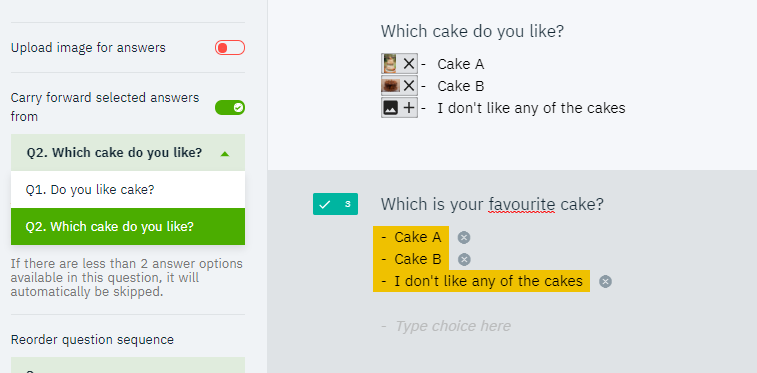
Carry Forward
Toggle Carry forward selected answers from: if you want to add the answers that respondents selected to another question.
-
Survey mobile preview
Look to the right to see how respondents would view the question on their mobile phones.
Once you have your questions ready proceed to the Review page
-
Review
Look to the bottom right side of the screen to find the Preview Full Survey, this lets you test the survey to check if all logic is in place. As your survey is in the testing phase, there is an undo button that will allow you to go back and forth to check the display logics you have in place. Remember! the undo button will not be available to respondents. Follow this link to know why!

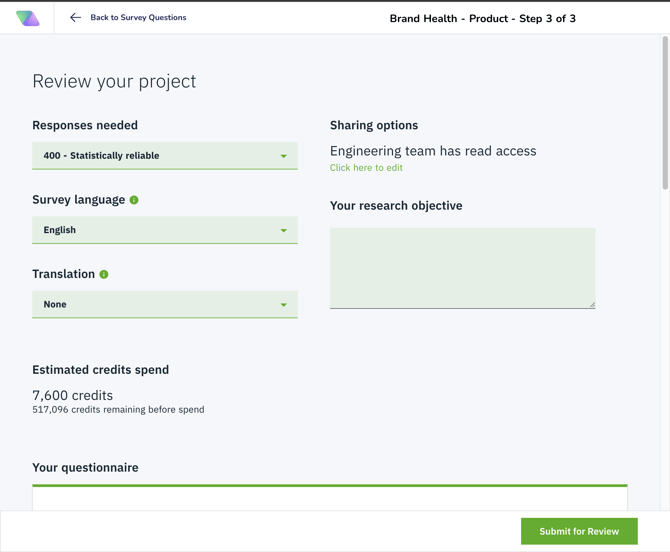
Last step before submitting your survey for review
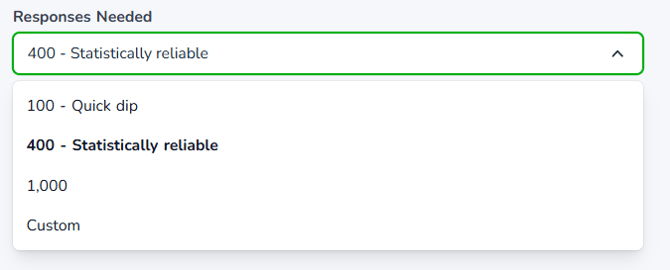
- Responses needed
You can select the number of responses from the list, or select Custom and input the number of responses you need.
-
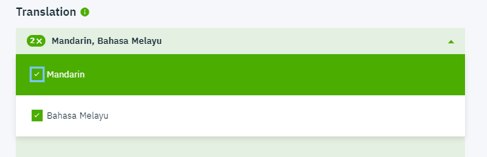
Translation
Toggle Translation if you have a need for the survey to be translated.
- Sharing the survey with your coworkers
Edit the Sharing option to invite your coworkers who have an Every account to view your survey.
If you would like to share with someone who didn't have an Every account or is outside your organization, you may toggle the Link sharing to On, set an Access code and share the survey preview link with them.

-
Submit survey for review
Once you're done click on Submit for Review; we will look into the survey and review it to see if it's ready for launch. We will reach out to you via the chat bubble or email if we have any questions or feedback.
When you return to the main menu, you should be able to see that your survey is being reviewed by our Research Experts in the Pending Reviews section located in the middle of the main menu.
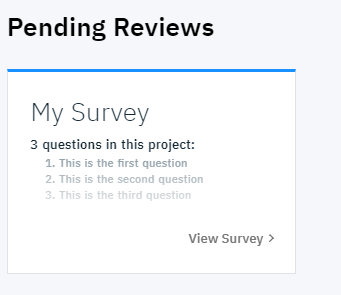
Our Research Experts will get back to you with suggested changes and feedback if we have any, and your survey will be sent back to "Drafts" so that you can make the changes accordingly.
Once the changes have been made, your survey will be ready to be launched to respondents to start data collection!
Reach out to us if you have any questions!